WooCommerce One Page Checkout
Features
Additional Content
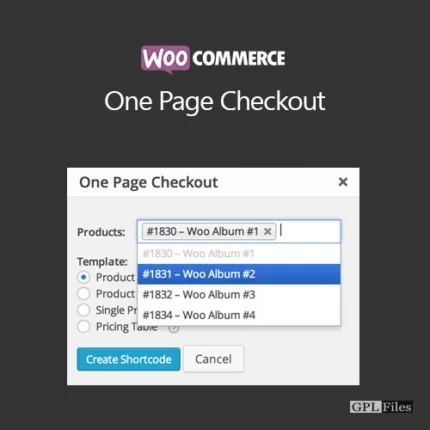
To place sales text, terms and conditions, or other material above or below the One Page Checkout product selection and checkout form, just add it above or below the shortcode in the WordPress editor.
Shortcode Attributes
Attributes allow for individualised configuration of the One Page Checkout shortcode. One attribute per shortcode is the maximum allowed. In the case where two or more sets of characteristics are present, the second set will be utilised to determine the final value.
Product IDs Attribute
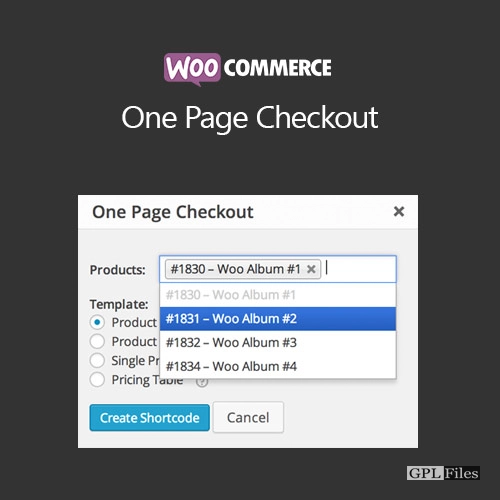
The product ids feature allows you to display only specific product IDs. See the sample below for how the attribute wants a list of product IDs to be formatted using commas.
You can also see how the product IDs affect the order of products on the cart page by looking at the list below.
If you don’t want to show any items, for example when utilising add-to-cart buttons outside of One Page Checkout, then you may simply omit or leave blank this attribute.
The attribute’s other goods will still be shown even if some of the product IDs specified there are incorrect.
Category IDs Attribute
The category ids feature is used to show items that fit into specific categories. This property works with either a single category ID or an array of IDs. Separate several category IDs using a comma, as seen below.
You may not want to display any items if you are utilising add-to-cart buttons outside of One Page Checkout. You can accomplish this by omitting or leaving blank the corresponding attribute.
The remaining goods from the legitimate categories will be shown correctly in the selected template even if one of the category IDs is incorrect.
Check out the WooCommerce product categories documentation if you need assistance with setting up categories.
Template Attribute
You may customise the layout of the fields for choosing products thanks to One Page Checkout’s usage of templates. The template shortcode property allows you to choose between a pre-defined template and a user-created one.
Product Selection Templates
The product selection fields that appear at the top of the checkout form may be displayed in a variety of ways thanks to the variety of templates provided by One Page Checkout.
Product Table template
Each product’s thumbnail, title, and price are shown in a single row inside the Product Table layout. Design elements were taken from the table that appears on the shopping cart page by default.
This layout is ideal for showcasing a small selection of items when visual cues are crucial in making a purchase decision, such as a box of Halloween masks.
Product List template
Product List offers a drop-down menu from which to choose a product from a list.
For products like eBook editions where the client doesn’t need to see a physical representation before making a purchase decision, this template is helpful.
Single Product template
The Single Product layout presents each item similarly to how it appears on the site’s default product page. In other words, it has the brief description, photos, gallery, and other meta data for the product.
This template is called “Single Product,” although it may really be used to showcase many items. The Single Product template from WooCommerce served as inspiration for this theme’s moniker. For the simple reason that it can only feature a single item, it is not called by that name.
Instead of bespoke content before the shortcode, this design is best used to showcase a single or two products on a page with relevant information presented in the product picker fields.
Single Product template for Variable Products
Also unique to the Single Product template is the presence of drop-down menus from which a buyer may pick from a number of available options for a product with several configurations. Different layouts highlight each variant individually. The Variable Product, rather than its constituent Variations, will be shown in the Single Product layout.
This is the best template to use if your product has many different configurations.
The fact that a client can choose a version for which not all characteristics have been determined makes this template unique. If a variable product has a Size property, for instance, you can tell the variants to use Any Size so that the buyer may select from a wide range of sizes without you having to individually define each one.
Pricing Table template
The in-built pricing table lists items in a two- to five-column table, with the title, price, and “add to order” entry at the top. At the very bottom of the table, you’ll see the goods’ shipping weights and measurements if they have them.
Configuring Attributes for the Pricing Table
The default price table design shows a list of product parameters, allowing you to highlight specifics about each offering.
The price breakdown will include both taxonomy elements and user-defined product attributes. As a result, the price table may be configured and set up with a custom product characteristic with less effort. When a large number of goods share the same qualities, it is much simpler to manage the taxonomy.
The attribute’s name will serve as the list’s heading, and each value will be shown individually.
The following price list provides an illustration using two product characteristics:
All three items come in a variety of colour options, but no two pieces are identical. Products in the first row have less features than those in the second and third rows, and products in the third row have more features than those in the second and first rows combined.
The following are the criteria that were utilised to get this cost breakdown. Take note of the dash (-) used in the first and second product’s custom characteristics to denote a slash (/) in the cost breakdown.
Easy Pricing Table template
The extension is compatible with the premium Easy Pricing Tables plugin as well as the free Easy Pricing Tables plugin (both by FatCatApps).
With One Page Checkout, a price list can be used in two ways:
- Using the Simple Rate Sheet Sample or
- Put a shortcode for an Easy Pricing Table anywhere in the page’s main text.
Creating Custom Product Selection Templates
As was previously mentioned, the One Page Checkout shortcode allows you to specify which template should be used by using the template property.
In order to tailor the presentation of items on your single-page checkout, you may develop your own product selection templates.
There are a few things you’ll need to do to make your own unique template.
- Make a new document in the /woocommerce/checkout/templates/ folder of your theme’s root.
- To showcase the items that were supplied to the template, use HTML and PHP.
- Create a separate text box for each product, then assign the product ID to it as a data property.
- The ‘wcopc templates’ filter is where you may register your template with One Page Checkout.
One Page Checkout Settings screen
Auto-Scroll
Store administrators have the option of turning off auto-scroll, which prevents the page from re-focusing once a product has been added to the shopping basket on One Page Checkout pages.
You’ll find the One Page Checkout option in the WooCommerce settings under “WooCommerce > Settings.”
If you tick this option, One Page Checkout pages will no longer scroll automatically when you add an item to your shopping basket. It is not possible to immediately scroll to the notifications that are filled at the top of the One Page Checkout page after adding an item to the shopping cart. The notifications will still remain on the website, but the user’s view will not be scrolled to reveal them.
If you leave this option enabled, the One Page Checkout page will continue to scroll automatically as you add items to your shopping basket. When a customer adds an item to their shopping cart on the One Page Checkout page, the page will scroll to the notifications that have been prefilled at the top of the page. The notifications will indicate whether or not the item has been put to the shopping basket.
FAQ
Can I include other content on the page?
Yes! Any text you put before or after the shortcode will be shown as usual on the order confirmation page. Keep in mind that the checkout fields will render after any text that follows the shortcode.
Video, photos, text, and HTML code are all fair game for a post or page’s body.
How can I customize the checkout form?
When you use the One Page Checkout shortcode on a page or post, the checkout fields will be shown using your theme’s default checkout template.
With a personalised checkout template or a WooCommerce add-on like Checkout Field Editor, you may modify the information requested from customers throughout the purchasing process.
Why does the “Add to Order” button appear for certain goods while the “Quantity” input appears for others?
Whether or not the product is marked as Sold Individually on the Inventory Tab determines whether the add to order button or a quantity input is shown.
For one-off purchases, a button input is the norm (as only one of these products can be added to each order). The WooCommerce quantity input appears if the product is not configured to be sold singly, allowing the consumer to increase the amount purchased.
On the Inventory tab of the Edit Product page, you may designate a product as “sold individually,” which will replace the quantity input with a button.
How are Variable and Grouped products displayed?
The in-built product selection templates only allow for single-item displays, with the exception of the Single Product template. Each child product within a product container that contains several items (such as Variable Products or Grouped Products) will be presented individually.
Each individual Simple product included within a Grouped product will also be presented individually (e.g. as a separate row in the table).
When using One Page Checkout 1.1 or later, the Simple Product template will show variable products with choose boxes allowing the client to choose a variant, much like the standard single product template that comes standard with WooCommerce. For this reason, it can’t be utilised to showcase an individual variant; rather, the entire Variable Product must be shown.
An example of a changeable product that has been integrated with the One Page Checkout shortcode and shown in its various iterations via the Product List template is shown below.
Why aren’t my variations displaying?
All of the variants of a variable product will be shown separately if the shortcode is not built using the Single Product template. As an individual row in the Product Table template or pricing column in the Pricing Table template, for instance.
As a result, these templates can only showcase variants when every attribute has a value.
Without the client picking the appropriate characteristics on the product page, the system cannot generate a unique variation ID for a variant with an unset attribute value. For this purpose, the only available template is the Single Product template.
However, the Single Product template only displays Variable Products, not individual variants, thus if you try to display only certain variations by putting their IDs in the shortcode, you will be disappointed. You may either select a different template that allows for the display of variants, or you can build a new product with the same features to use with the Single Product template.
Can I insert two checkout shortcodes on one page?
Unfortunately, each page can only have a single shortcode.



Reviews
There are no reviews yet.