

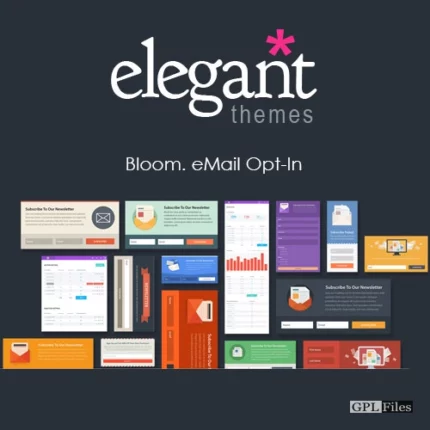
Elegant Themes Bloom Email Opt-Ins
Getting Started
Bloom is a plugin for growing your email list. Bloom adds email opt-in forms to your website that link to your email marketing programme. When someone uses Bloom, they’re added to your email list. Bloom works with plenty of email marketing tools and allows you to develop multiple opt-in forms for your website (such as pop-ups, fly-ins, or normal inline forms).
Add New Accounts
Bloom must be connected to your email marketing platform before you can develop an opt-in form. Bloom supports MailChimp, Constant Contact, MadMinim, iContact, InfusioSoft, Feedblitz, Aweber, Campaign Monitor, GetResponse, SendInBlue, MailPoet, and Ontraport.
First, link an account to Bloom. To access Bloom settings, click Tools > Bloom Settings in your WordPress Dashboard, then click the accounts icon. “Add Account” adds a new account. Choose from Bloom’s account kinds here. After selecting an account, you must validate it so Bloom may access the system’s API. Each account’s verification procedure may be different, but in most situations you’ll be asked to provide your API key or AppID from your email marketing software’s online account. Our accounts guide provides step-by-step instructions for setting up each account type. Our accounts lesson shows how to connect Bloom to each supported system.
Create your first op-tin form after establishing an account.
Creating An Opt-In Form
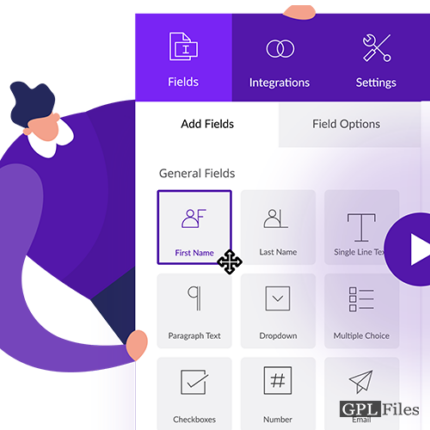
The Bloom > Email Optins link in your WordPress Dashboard or the “Home” button on the Bloom settings page will reveal the main settings tab, where you may construct an opt-in form. In this section, you may manage the opt-ins you’ve already made and add new ones. Click the “New Optin” button to start building your first opt-in form. The 6 opt-in kinds that Bloom supports will be made clear by this.
You may construct 6 distinct types of opt-in forms with Bloom. You may construct as many forms as you like, and each one can be displayed in a different location on your website.
Pop-Up
The pop-up opt-in places a lightbox pop-up with your opt-in form on your website. You have more control over when visitors see these pop-ups thanks to the variety of Bloom triggers available for these pop-ups. Please read our comprehensive pop-up tutorial for additional details on the pop-up optin.
Fly-In
The fly-in is comparable to the pop-up but is a little more subdued and little. The fly-in provides a smaller form that slides up from the bottom corner of the page rather than a full-screen lightbox pop-up. These fly-ins may also be triggered by various user events utilising Bloom triggers, much like the pop-up. Check out our triggers tutorial for additional details on how to utilise triggers efficiently. Please read our fly-in lesson for a thorough, in-depth look at the fly-in optin.
Below Post
Perhaps the most typical opt-in kind is this one. By doing this, an opt-in form is generated and appended automatically at the bottom of your articles or pages. After reading your post, a reader is shown an opt-in form where they may sign up to get blog updates from you. Please read our comprehensive below post tutorial for additional details on the below post opt-in.
Inline
You may insert an opt-in form anywhere within your posts and pages using the inline opt-in feature. To show the opt-in form anywhere on your website, just paste the shortcode generated by the form into your articles and pages. Check out our thorough inline guide for additional details on how to use this opt-in.
Locked Content
By asking users to sign up before viewing anything on your website, locked content is a terrific method to grow your email list. A post’s content, such as a link to a page where you may download free materials, might be locked. The material that is concealed behind the form is made available to the visitor when they subscribe. Locked content opt-ins automatically created a shortcode that you may embed around the material you want to “lock” in your articles. See our comprehensive protected content lesson for additional details on this opt-in type.
Widget
An opt-in in the form of a widget is automatically created by the widget opt-in. Once created, the widget may be added to any widgetized section of your website, such as the sidebar or footer, by visiting the Widgets tab in the WordPress Dashboard. Be sure to read our thorough widget tutorial for additional details on this opt-in type.
You will be sent to the opt-in creation screen after choosing your opt-in type, where you may modify the different opt-in options. These options are divided into three groups: Setting, Design, and Display Parameters
Opt-In Setup
The Setup tab is the initial page of the opt-in creation form. Here, you may change the name of your opt-in form, which serves just as a reminder for you. It will be mentioned in your stats and on the homepage tab. If you haven’t already, you may add a new opt-in account on this page by using the Accounts tab. You can choose the account you already made here if you have. You will be provided a list of the account’s related email lists after choosing one. Go to the next page after choosing the list you want to use from the dropdown menu. Subscribers will be added to the list or account you chose here once your opt-in form is online.
Opt-In Design
The creation of your opt-in form comes next. You will initially see a collection of ready-made templates after you select the design tab. Consider them as a place to start. We worked really hard to produce more than 100 design alternatives that we think look excellent. Look through the thumbnails and pick the version that appeals to you the most. Don’t worry; everything will still be customizable on the next page. Click the next button to display the design modification options after choosing a template starting point.
You may modify every aspect of the appearance of your opt-in form using these parameters. Simple changes like changing the form’s title, description, and picture are possible, as are more complex ones like changing the form’s background colour, text colour, orientation, image, border style, and edge style. You may construct just about anything by combining these various design parameters. By selecting the “Preview” option on the right side of the page, you may also get a preview of your personalised form at any moment. Please read our comprehensive design settings lesson for additional details on each design parameter as well as tips on how to utilise them effectively. Once you’re done creating your opt-in, select “Next” to go on to the display options.
Opt-In Display
Your opt-in forms’ appearance, location, and timing are all governed by the opt-in display options. You may decide which post kinds or categories will show your opt-in form. Additionally, you have the option to omit or target specific articles and pages. (Note: The Inline and Locked Content opt-in forms do not have these parameters. These options do not apply since shortcodes are used to show these forms. You will see a “Generate Shortcode” button if the form you generated is Inline or Locked Content. To show the opt-in form, just copy and paste the shortcode into any post or page.)
For instance, you would choose “Display On: Posts,” leaving the other parts unchecked, if you wanted your opt-in form to appear on all of your posts but not any of your pages. Leave all boxes under “Display On” unchecked if you want your opt-in form to just display on one page, and then use the “Display On These Pages” section to choose the page you want it to appear on. You may choose Display On: Everything and then use the “Do Not Display On These Posts” choice to omit a certain page if you want your opt-in form to appear on your whole website but not on a specific post or page. You may choose exactly where your opt-in form is shown using these various parameters.
You will also be given a variety of triggers whether you are designing a fly-in or pop-up opt-in. These triggers determine when and how your opt-in is presented, not where it is displayed. You may decide, for instance, to only display your opt-in form once a visitor has completed reading your post or after they have made a purchase from you. Check out our comprehensive triggers lesson for additional details on triggers. Please read our comprehensive display settings guide for a detailed look at all of the opt-in display options.
Click “Save and Exit” once you have completed generating your opt-in. You will then be returned to the Bloom settings panel’s main page. You will see that the page now has your freshly formed opt-in. Using the different options icons, you may change, remove, deactivate, or create split tests for this opt-in.
Managing Your Opt-Ins
When you have generated opt-in forms, you will see that each form is shown on the Bloom settings panel’s home page. From this page, you can quickly manage each of these opt-ins. The setting icons that display to the right of each opt-name in’s allow you to adjust various settings for each opt-in.
Generate Shortcode
The inline opt-ins and all locked content will display the shortcode icons. This icon’s click will reveal the shortcode required for that particular form. To show the opt-in, copy and paste the shortcode into a post or page.
Split testing is a fantastic approach to improve your opt-is. By starting a split test, you may make different versions of the same opt-in form and compare them to one another to see which one converts at the highest rate. Different visitors will see each alteration you make, and their statistics will be maintained separate. To test how different design elements impact user interest, consider experimenting with different headlines, colours, graphics, and so on. Each variation’s conversion rate will be displayed, making it simple to determine which is the most successful. You can call a split test when you are happy with the results and choose the most successful variant. Please read our comprehensive split testing guide for further information on how to create split tests.
Disable
An opt-in form can be turned off at any moment without being deleted. After appearing, the form will no longer be visible on your website and will be repositioned farther down the page into the list of inactive opt-ins. This form may be saved and reactivated at a later date.
Duplicate
A form can be copied at any moment. You may easily replicate the opt-in if you have spent a lot of time building a form and want to make a new variant based on it or if you want to make a different opt-in type using the same design parameters. The sort of opt-in you want to generate will be shown to you when you first click the duplicate icon. You may alter the opt-in type while maintaining your design settings even when duplicating.
Delete — An opt-in may be permanently deleted if you decide that you no longer wish to utilise it.
Modify – An opt-parameters in’s can always be changed. You may alter the opt-in settings using the Setup, Design, and Display tabs on the opt-in creation screen by clicking the modify button to return there.
Bloom Statistics
Understanding the efficacy of your opt-ins is the next step after creating them. You can learn a lot about how each of your opt-in forms is doing using the Bloom metrics page, as well as how quickly your email list is expanding overall.
The Bloom analytics page has a wealth of useful data, including general growth statistics, an in-depth analysis of the success of each opt-in form, a historical graph of the growth of your list, and details on your best-performing sites.
This has been a rudimentary introduction to Bloom, and we have just briefly discussed the idea behind developing opt-in forms. We have detailed tutorials that go into great detail about each setting and how it operates for each part above. Browse the remainder of our lessons on the Bloom Documentation page if you haven’t already.


Reviews
There are no reviews yet.