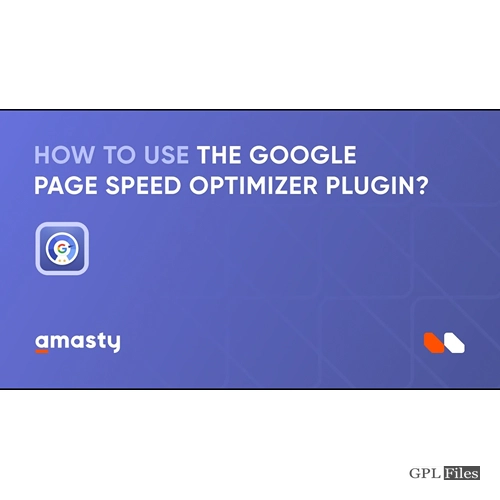
Google Page Speed Image Optimizer 1.5.5
Original price was: $14.99.$3.99Current price is: $3.99.

Google Page Speed Image Optimizer
Optimize Images and do Images Compression
This plugin can compress photos without compromising their quality. When there are too many photos to optimise again, the plugin remembers which ones have already been optimised and skips through them.
HTML, CSS and JavaScript Compression
This option (which is enabled by default) compresses HTML, CSS, and JavaScript files before transmitting them to the browser. By editing the.htacess file with specific directives, loading times can be decreased.
Leverage browser caching
The browser’s cache can be used to store static resources such as style sheets, images, HTML, Java script, etc. Repeatedly loading the same data is avoided. It’s the easiest to spot improvement in speed because it boosts your score on tools like gtmetrix, pingdom, Google PageSpeed Insights, and others.
Lazy loading of images
Improves performance and score by adding code to load pictures after initial visible material has loaded.
Query strings, emoji and smiles removing
Get rid of the unused and unnecessary items. Not much in the way of actual speed gains, but it might help you gain a few notches in Google’s pagespeed insights.
The Benefits of Formatting Your Images
In the first place, why is image formatting necessary? Please explain the advantages. Performing performance optimization on your photos has many advantages. HTTP Archive reports that as of the month of November 2018, graphics account for an average of 21% of a webpage’s total weight. Therefore, following video content, optimising your WordPress site’s photos should be your first priority.
Much more so than the use of specific scripts or typefaces. Furthermore, despite the fact that a proper image optimization procedure is one of the simplest things to perform, many website owners still miss this.
How To Optimize Images for Web and Performance
When formatting your photographs, you should strive for the sweet spot between small file size and sufficient quality. Almost all of these optimizations can be accomplished in many ways. Compressing them before uploading to WordPress is a common practise. This is often accomplished in a programme like Photoshop or Affinity Photo. We will go over how plugins can help with some of these chores in further detail down the page.
Both the file format and compression method should be carefully considered. Image size can be reduced by as much as 5 times by using the appropriate mix of file format and compression type. You’ll need to try various image and file formats out to find the one that works best.
Choose the Right File Format
Make sure you’re using the appropriate image format before you begin editing.
There are several types of files you can use
- PNG – generates images with higher quality, but with a bigger file size. Was initially designed to be a lossless format but can also store images with some degree of data loss.
- When compressing images, JPEG uses both lossy and lossless compression. The quality setting allows you to find a sweet spot between file size and visual fidelity.
- The GIF format is limited to 256 colours. When dealing with animated pictures, this is the method of choice. When compressing, it never utilises compression techniques that lose data.
While certain browsers may be able to display images in JPEG XR and WebP, this is not the case for everyone. Images with many colours are best saved as JPEG or JPG files, whereas simple images can be saved as PNG files.
Compression Quality vs Size
This is what happens when you try to compress a picture too much. The first yields the best quality by far, and that’s by using a very low compression rate (but larger file size). The other is a drastic reduction in image quality due to excessive compression (but smaller file size). The original, unaltered size of the image is 2.06 MB.
The original size of the image displayed above is 590 KB. That’s a lot of space to dedicate to a single photograph. Keeping a webpage’s total weight under 1 or 2 MB is recommended. A size of 590 KB is already a quarter of that. The second image is clearly terrible in appearance, but it is only 68 KB in size. Locating a balance between compression quality and file size is your goal.
As you can see below, we retook the picture with a medium compression rate, and the result is a high-resolution picture of reasonable size (151 KB). With such poor compression, this image is almost four times smaller than the original. Simplified pictures, such as PNGs, should ideally be around 100 KB in size for optimal speed.
Lossy vs Lossless Optimization
This filter eliminates some information, hence it is considered “lossy.” You should be careful about how much you shrink the image because doing so will degrade it. There is room for significant compression of the file. A picture’s quality can be tweaked with the use of photo editors like Adobe Photoshop or Affinity Photo. The compression method we employed earlier is known as lossy.
The data is compressed without any quality being lost during the process. Without uncompressing the photos first, rendering them would be impossible. Tools like Photoshop, FileOptimizer, and ImageOptim allow for lossless compression to be performed right on your desktop.
See what works best for each image or format by experimenting with different compression methods. Make sure the image is web-ready by saving it in the appropriate format using your tools. Having the ability to fine-tune the quality of your image before compressing it is a feature available in many graphic design programmes. Some quality will be lost; to avoid making the photographs unattractive, try several settings until you hit the sweet spot.
Image Optimization Tools and Programs
Many paid and open-source applications can help you enhance your photos. Some assist you in optimising your own system while others take care of it for you. Because it is inexpensive and provides nearly the same capabilities as Adobe Photoshop, we are strong supporters of Affinity Photo.
Related products
-
Sale
Qubely Pro 1.4.3
Original price was: $14.99.$3.99Current price is: $3.99. -
Sale
WPMU DEV Hustle 7.8.8
Original price was: $14.99.$3.99Current price is: $3.99. -
Sale
Apex Notification Bar - Responsive Notification Bar Plugin for WordPress 2.1.8
Original price was: $14.99.$3.99Current price is: $3.99. -
Sale
Admin Columns Pro Toolset Types 1.8
Original price was: $14.99.$3.99Current price is: $3.99. -
Sale
Element Pack - Addon for Elementor 6.4.0
Original price was: $14.99.$3.99Current price is: $3.99. -
Sale

Contact us all-in-one button with callback request feature for WordPress 2.2.4
Original price was: $14.99.$3.99Current price is: $3.99. -
Sale
Formidable Forms - Quiz Maker 3.1.4
Original price was: $14.99.$3.99Current price is: $3.99. -
Sale
Modula Pro 2.8.21
Original price was: $14.99.$3.99Current price is: $3.99.